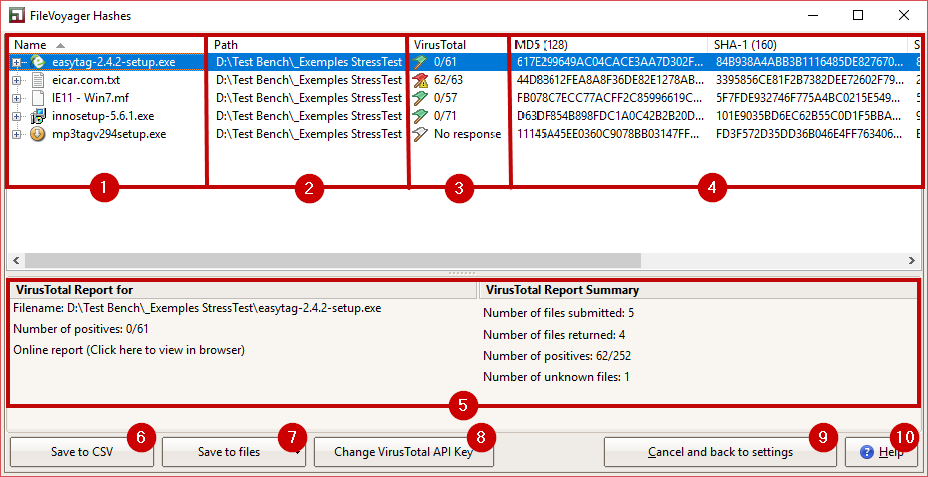
FileVoyager, as of version 19.05.01, has integrated with the renowned site, VirusTotal.com. This integration enables FileVoyager to query the VirusTotal database and detect the malware potential of the submitted files.
To give you an idea of how VirusTotal.com operates, I’ll provide a brief summary based on the related Wikipedia article. However, please note that I will not delve into the details of its inner workings:
VirusTotal aggregates many antivirus products and online scan engines to check for viruses that the user’s own antivirus may have missed, or to verify against any false positives. Files up to 256 MB can be uploaded to the website or sent via email. Anti-virus software vendors can receive copies of files that were flagged by other scans but passed by their own engine, to help improve their software and, by extension, VirusTotal’s own capability. Users can also scan suspect URLs and search through the VirusTotal database.
To perform a query on the VirusTotal database, we submit the file hashes to the website, rather than the actual file data. This ensures that sensitive data is not transmitted.
It’s because we need to compute the hashes that the integration with VirusTotal is made through the Hash Tool.
Configuring to query VirusTotal.com
To check files, follow these steps:
- Select one or more files or folders in FileVoyager (If you’re not sure how to do this, refer to this documentation page on selecting items).
- Open the Hash Tool (If you’re not familiar with the Hash Tool, consult its documentation)
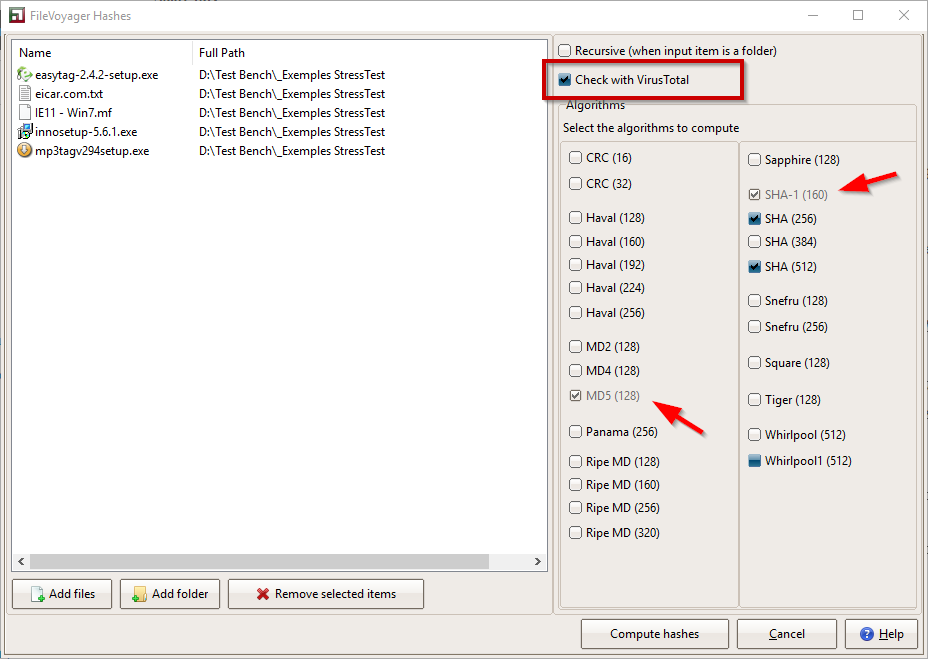
- In the Hash Tool configuration, select the Check with VirusTotal checkbox. This will automatically choose the SHA-1 and MD5 algorithms (indicated by the red arrows in the image below). You cannot unselect these algorithms because VirusTotal.com requires one of these two hashes to perform a search.
- Click on the “Compute hashes” button.
The VirusTotal API key
In order to use VirusTotal.com’s API, you will need an API key. Fortunately, obtaining an API key is a straightforward process. Simply sign up for a VirusTotal Community account. After creating your account, you will be able to find your personal API key in your Community profile. With this key, you can start using VirusTotal’s API.
Keep in mind that free API keys come with some limitations, however:
- If you request reports for multiple files simultaneously, only the first four reports will be returned.
- You are restricted to a maximum of 4 reports per minute.
To remove these limitations, you can purchase a Private API from VirusTotal.com.
FileVoyager comes with an internal API key that is used by users worldwide. However, this means that during periods of high query volume, it is possible that you may not be able to retrieve VirusTotal reports. To avoid this issue, it is strongly recommended that you sign up for a free API key at VirusTotal.com and use it in FileVoyager.
When you click on the “Compute Hash” button (as shown in the image above), FileVoyager provides a screen where you can enter your own API key.
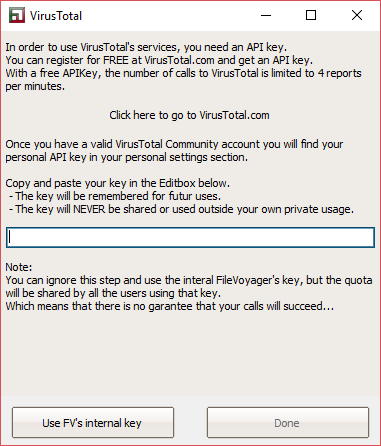
You have the option to ignore this step and click on “Use FV’s internal key”, but there is no guarantee that the malware check will return reports in this case.
The VirusTotal report
In the configuration screen above, I have selected five files to be checked against VirusTotal database.
- Three .exe files from the web
- One .txt file that is a malware (don’t be afraid, it’s just a malware test file from eicar.org).
- One .mf file that is supposed to be only on my machine
The resulting window is the following
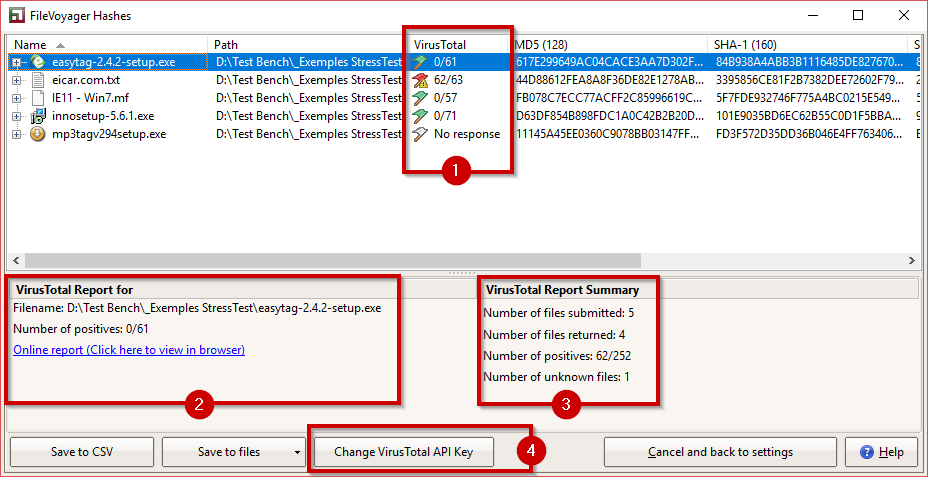
I will focus only on the VirusTotal-related feature in this section. If you’d like to learn about the other functionalities of this window, please refer to the documentation of the Hash Tool.
- In the red box labeled 1, you can find the column where the VirusTotal reports are displayed.
- The column displays two numbers separated by a slash (/): xx/yy
- The number xx indicates the count of positive detections of malware by antivirus engines.
- The number yy represents the total number of antivirus engines used to scan the file.
- The flag icon in the column shows the status of the file in the VirusTotal database.
- A green flag means that no positive detections were found, which indicates that the file is likely to be safe.
- A yellow flag means that between 1% and 25% of the antivirus engines have flagged the file as malware.
- A red flag with a warning sign indicates that more than 25% of the antivirus engines have classified the file as malware.
- A white flag means that the file is unknown in the VirusTotal database, or that no response has been returned by VirusTotal, likely due to limitations of the free API key.
- The column displays two numbers separated by a slash (/): xx/yy
- In the red box labeled 2, you can see specific details about the selected file in the list.
Clicking on “Online report” opens the browser to the VirusTotal.com page for the selected file, where a detailed report is available.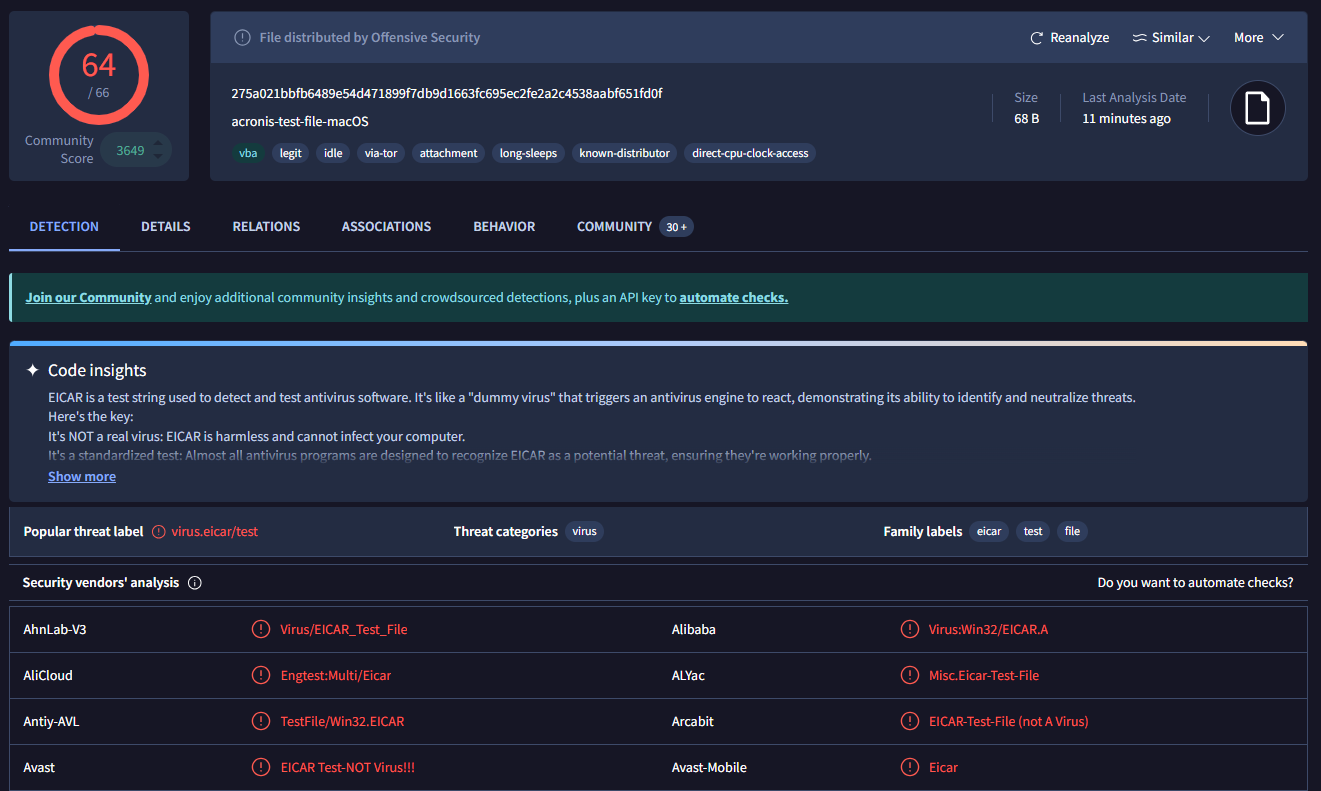
- The red box labeled 3 displays an overall summary report of the current query.
- If you want to use your own API key instead of the mutualized one, click the “Change VirusTotal API Key“button to open a window where you can enter your API key.
Submit file to VirusTotal.com
When the flag is white and the status is “Unknown,” it indicates that VirusTotal has never scanned the file for malware.
In this case, you can choose to submit the file to the VirusTotal site for a scan. To do this, select the file in the list, and a button will appear in the VirusTotal report pane. Click on it, and you will be prompted to upload your file for scanning.
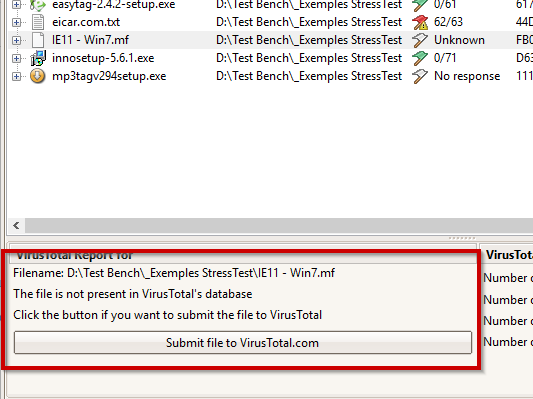
When you submit a file, its status will change to “Busy…”, with a magnifier icon. This means that the file has been successfully uploaded to VirusTotal for scanning.

It may take some time for VirusTotal to process the file. FileVoyager will not automatically retrieve the new report, so you will need to return to the configuration screen and query the report again at a later time.
In the example above, I waited less than a minute before retrying, and the report was successfully returned.


